Sunday, 20 February 2011

Harvests then and now

At the end of last summer I dug around to see what was up with the potatoes, which I'd been neglecting along with everything else in my clay-heavy, acidic, poorly drained garden. There were some nice suprises in there, certainly enough for a small potato party.


One was a Russian Blue (I had planted red, yellow and blue varieties: Red Chieftain and Yukon Gold were the other two):


The good news was no sign of wireworm, although the Russian Blue looked a little poorly from some unidentified rot/ailment/grub and I got very few whole potatoes.

And then in December, I rooted around in a couple of containers. In a large pot I found some Oca (Oxalis tuberosa) that had survived the frosts of November (with a peanut for scale):


Delicious both raw and roasted like a potato. It's a root vegetable from the Andes, which I bought at Seedy Saturday last year from Carolyn Herriot. She sells them through her website. Not cheap, but one will give you a harvest and tubers for the future.

Someone else at Seedy Sat last year provided the Jerusalem Artichokes which are also wonderful both raw and cooked. I bought some more from Metchosin Farm this year. Mine grew happily in a less than perfect location (a recycling bin), and resisted frosts even better than the oca. This one apparently spreads like anything, hence the bin, which probably curtailed their growth a bit.


Today's harvest of greens included some new growth on last year's collard greens, which are calcium-rich and useable like cabbage leaves; the last of the brussels sprouts; and some of spring's best offerings: kale buds, which are sweet, tender and similar to young broccoli.

Thursday, 17 February 2011

Mushroom growing


I went to a free workshop at Cannor Nursery a couple of weekends back, to learn about mushroom cultivation. The speaker, Gary Hagel,


has been growing mushrooms for about three years and offered to share some techniques and ideas about it. It was a very full morning.

His interest is not restricted to growing mushrooms for food; he's also interested in the capacity of mushrooms to break down hydrocarbons. He recommended his personal "mushroom bible" by Paul Stamets: Growing Gourmet and Medicinal Mushrooms. Stamets elaborates on the environmental and disease-fighting aspects of mushrooms on his TED Talk: Six ways mushrooms can save the world.

We started off with a demonstration of cloning mushrooms, which he says is the easiest way to propagate. He illustrated some of the sterilization techniques involved - without them you can end up with molds and bacteria that will kill off your mushrooms and leave you with a big green mess. To get underway, following the Stamets methods, you'll need an assortment of items, including:
  • A good book (as stated)
  • A glove box (you can make armholes by heating a coffee can and burning through the sides)
  • Rubbing alcohol
  • Hydrogen peroxide (don't know what strength - I'm guessing stronger than you'd get over the counter at a pharmacy)
  • A pressure cooker with pressure valve
  • Jars, suitable for pressure cooking, with screw-on lids
  • Hypodermic syringes
  • Scalpel
  • Lighter (for sterilizing needles)
  • Micro pore tape
  • Tinfoil
  • Large clear plastic bags
  • Agar (can buy in Chinatown)
  • Heavy duty plastic bags with ventilation patches (specialist item)
  • Growing medium (organic and/or untreated rye, corn, chickpeas etc)
  • Depending on what kind of mushrooms you want to cultivate, you'll also need straw (buy at garden supply stores) or hardwood chips/sawdust (buy from pet supply stores: do not use coniferous wood, and especially not cedar which has bactericidal properties) or hardwood logs with intact bark (alder is popular on the island; oak or maple can also be used)
He started with instructions on cloning mushrooms, which he says is the easiest method of propagating; you can do it with any mushroom you buy.

You'll need a prepared (sterile) growth medium; he used rye grain, because it was cheap and available from garden supply stores, but says corn and chickpeas work well too. Wash it and then soak it in water and gypsum for 24 hours. Drain and spread on cardboard to dry for around 2 hours. put in a sterile mason jar. Cover barely hand-tight with a screw-top lid that has had its top punctured and then sealed with micro-pore tape. This will prevent micro-organisms from finding their way into the sterile medium. (The one shown contains a month's worth of mycelium already)


Cover the lid with tinfoil. Place on a rack (or on a base of screw-top lids) in a pressure cooker and add water. Pressure cook for 90 minutes at 15 lbs pressure. Then move on to the cloning.

First you sterilize your glove box by wiping it with alcohol. This removes bacteria and microorganisms that would interfere with the growth of the mycelium.


Then using a sterile scalpel (and presumably wearing sterile gloves) nick a piece of mushroom off.


Dip it in hydrogen peroxide and place into the sterile growing medium. Put it somewhere dark and warm (75f) for about one month.

Prepare some straw or wood chips or make plugs to grow it in logs. To prepare straw, steam it for about an hour to get rid of any mold or bacteria. Dry it and put it in clean, sterile (wiped out with alcohol) bags. Pour in the aged, inoculated rye grains and give it a shake. Cut slits in the sides of the bags so the mushrooms can fruit. Return to warm, dark environment and mist the outside of the bag daily. When the mycelium has developed through the straw, it's ready to fruit and for this needs oxygen and light.


Oyster mushrooms, above, which grow best in straw: just twist gently to harvest. Once fruiting has completed, soak the bag in a tub of water for 24 hours and will fruit again, another 3-4 times. It only takes about a week for oyster mushrooms to fruit.

Propagating with spores is more time consuming, and involves agar and petri dishes. Spores are easy to collect: place a mushroom on tinfoil for 24 hours and you'll have them. But you'll have to do this in a sterile environment, and scrape the spores into sterile water and transfer them in a sterile needle onto sterile agar in a sterile petri dish. But it's a useful technique for specialist mushrooms - such as mail order ones - where you may only have spores to work with.

Other mushroom varieties were discussed briefly: button mushrooms (grown on compost) and chanterelles (best to collect wild as the mycelium is extremely slow to grow, taking years in fact).

He led us through liquid culture, which involves honey and water, and is useful for cultivating shiitake mycelium for long-term storage (keeps 6 months to a year in the fridge). Dissolve 2 tbsp honey in a jar 3/4 full of tapwater. Prepare the jar lid by puncturing it and sealing with epoxy.


Close, barely hand tight, cover with tinfoil, and pressure cook in water on a rack for one hour at 15psi. This is the sterile growing medium. Add mycelium to the water using a sterile needle, and keep warm and dark for about 1 week after which it can be used or stored in the fridge until needed.


Remove mycelium with sterile needle and use to inoculate wood plugs (for growing in logs) or wood chips.

To grow in wood chips (available from pet stores) use poplar or any hardwood. Mix 80 per cent wood chips with 20 per cent bran in a big bowl.


Soak, strain until moist but not wet. Place in a special heat-resistant bag (sterile, plastic, with a built in screen for filtration). Add a piece of clean tyvek to the neck of the bag and pressure cook 2 hours at 15 psi.

Add the mycelium in the sterile glove box. Seal and keep at 70f in the dark for about 3 months.


When mycelium threads start showing, soak the bags for 3 days and then open to let the mushrooms fruit.

To cultivate in logs takes about 2 years, but after that they'll go on producing for about 9 years. Alder, oak, maple are good choices. Not cedar or conifers.

Prepare the spiral groove dowel plugs


by half-filling a jar and then pressure cooking them at 15 psi for half and hour. Add the mycelium and keep warm and dark for about 2 weeks.


Scrape lichen and fungus off the logs, but not the bark which is an essential part of the process. Drill holes


and place inoculated spiral groove dowelling plugs in them. Seal with wax or Seal n Heal.


Put about 20 plugs in a 4 foot log. They'll need moisture - soaking with a garden hose - and protection from wind.

Sunday, 16 January 2011

GTUF Seedy Sunday 2011


Gorge-Tillicum's Urban Farmers (GTUF) swapped and talked this afternoon, as we held our second annual Seedy Sunday.


It's a powerful time, when you think about it, this fairly casual affair (with all due respect for those who planned and arranged the tables, thought to bring bags and labels, and swept a small garden's worth off the floor afterwards).


The seeds we're sharing are the product of a year's worth of growing in our own neighbourhood, and at least a year's worth of precious know-how about particular plants in particular microclimates and local soils.


We were infiltrated by a few folk from nearby neighbourhoods, who brought some interesting seeds and stories of their own. Overall the variety of seeds brought was wonderful, particularly as no guidelines were given about what to bring. Must have been a dozen tomato varieties there, as well as lots of interesting greens and brassicas and legumes and root crops and herbs and flowers.


And as usual the snacks were a welcome treat, particularly on a blustery, rainy day in a period of same. A time for garden planning I suppose.


We had a useful chat afterwards, where people could ask questions about the seeds or other issues to do with growing. An interesting discussion about Fire Blight that had been diagnosed on a local pear tree: we learned that it can be caused by disruptions in air circulation in orchards; even a neighbour putting up a fence, as had been the case, can give airborne pathogens an easier route into plant tissues when they're not being blown about.

Monday, 5 July 2010

Aphids everywhere and a few things growing nicely

According to the Vancouver Sun, the cool grey weather is largely responsible for the aphid infestation in my garden (and the rust.. and the apple scab). Never had them so bad, but then have never grown fava beans before. Which they love, apparently.


Also squash


and honeysuckle


and artichoke


My little heroes are trying to cope.


I deliberately left the honesuckle alone hoping it would attract some aphid eaters. I saw a wasp on there yesterday so perhaps they've nibbled on a few, but I've been obliged to get out and blast with my soap spray to try to save what I can. And I had a nice feed of fava beans last night.


And managed to harvest my garlic yesterday despite the rust that hit it a couple of weeks ago. Going to hang it in the shed to cure today, if it ever brightens up.


Guerilla gardening? I used to think so, but it turns out we have vegetable advocates among the municipal gardeners in Saanich Parks. Each year they plant squash among the flowers, which is furtively harvested by passersby. Bless 'em!


Some experiments in propagation working out. I stuck some wisteria trimmings in a pot last fall and here's one of its children.

Sunday, 4 July 2010

Forest gardening

I attended a mind-blowing seminar last weekend, by BC based forest gardener Richard Walker.


He's been an organic farmer his whole life, and that has led him into medicinal plants and the development of methods of growing edible and medicinal plants in layers, using principles of permaculture and sustainability.

He started off by talking about the value of nutrient-dense foods (such as those you raise yourself by organic growing methods) - you need less land to grow smaller quantities of high quality food. One way to measure the value is to use the Brix meter


to measure the sugar content, which will be at its highest, normally, for fruits and vegetables picked when fully ripe and eaten very soon thereafter. Many fresh foods lose a dramatic amount of nutritional value when stored for long periods of time, or transported over long distances; it is believed as well that foods grown in healthy, well nourished ecosystems will be richer in nutrients. Wine growers use Brix meters to measure the sugar content (and ultimately the alcohol which will result) of their grapes, but they can be used on any food that can be juiced - Walker has a customized pair of pliers


for the purpose. He measured three strawberries the first day, and the findings were very interesting: a conventionally raised strawberry (about 10), a home-grown, fresh-picked strawberry (12) and an organic strawberry (about 8). Of course many things can affect the sweetness of strawberries, including sunshine, water and ripeness when picked as well as length of time since picking and nutrient levels (e.g. calcium) in the growing medium.But the bottom line is, the sweeter the strawberry the higher the nutritional value and the fewer you need to eat to feel sated.

We also looked at - and practiced -


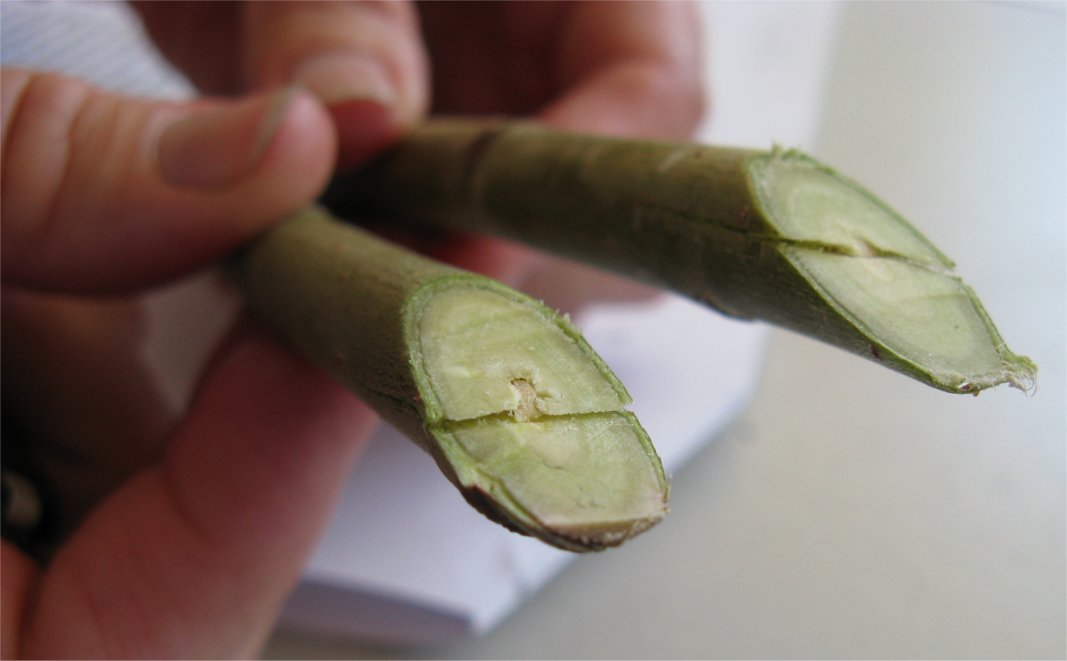
grafting


and budding techniques.


He is a man who knows his trees, and talked as well about pruning and tree management, and observed that the maple tree


that had been donated to celebrate the opening of the community garden


where the course took place was not long for this world. It had been badly supported


in ways that had stunted and damaged it, and weakened its branches permanently, so that they are bound to shear off if they get big enough to be blown about while carrying the weight of their leaves.

The heart of the weekend was spent talking about his ideas about growing food in vertical layers. Ideally, for those with the space to accommodate all of the layers, you'd start with a tall canopy tree - a tall nut tree, like a walnut or edible chestnut - that provides food and/or leaves to nourish the soil; and then work downwards: a smaller tree like a fruit tree; next a tall food bush like a saskatoon or small tree like hazelnut; then perhaps a berry bush like a blueberry or raspberries; then a herbacious layer: nettles, borage, asparagus maybe; and weaving through all of this, some vines like kiwi or passion flower. He adds legumes in tree (alder, Caragana frutex/Russian peashrub, wolf willow) and herbaceous (alfalfa, clover, fava/broad beans) forms. Tailoring this to an urban setting means scaling the size and span down, and knowing what will thrive in shade, and how to arrange for appropriate watering and nourishments.

He spent a good deal of time talking about compost, and the distinctions between fungal (forest ecosystems) and bacterial (more vegetable-based agricultural ecosystems) soil requirements, which was a new but immediately obvious line of thought. He offered variations on compost teas that would suit the two different plant groupings.

All in all it was enriching and spectacularly informative and we all staggered out of there on both afternoons, minds full to bursting.